Description
Our goal was to design a passive solar home that could use as little energy as possible, while still being fully functional and luxurious. We attempted to make our design as flexible as possible in terms of location. It is able to be constructed anywhere relatively flat with enough room for our foundation. This project was significantly larger than any other project we have done before. The main pieces of this project were learning day lighting techniques,designing a water heater,testing various building materials, how to generate electricity, and finally blueprinting the house.
Solar Water Heater
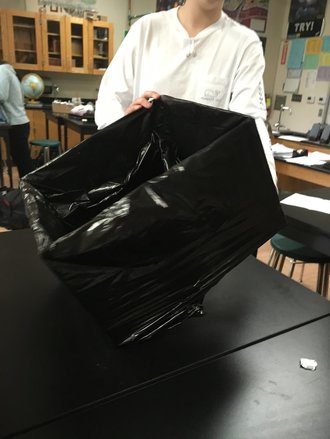
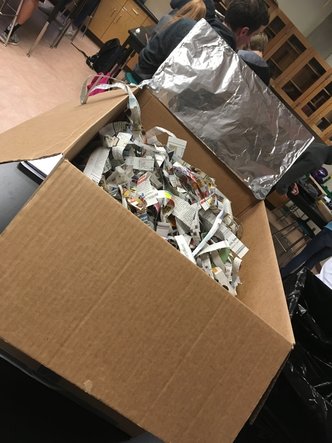
We created a solar water heater to heat our house using no electricity. We were supposed to use the least amount of connections between tubes, so that the risk of leakage is reduced. My group used 0 connections. We brought in 2 boxes, one smaller than the other. The bigger one we insulated with newspaper, the smaller one we covered with a black trash bag. We put water in the smaller box and using tin foil, we attracted heat from the sun.
Here is a picture of our solar water heater:
Our goal was to design a passive solar home that could use as little energy as possible, while still being fully functional and luxurious. We attempted to make our design as flexible as possible in terms of location. It is able to be constructed anywhere relatively flat with enough room for our foundation. This project was significantly larger than any other project we have done before. The main pieces of this project were learning day lighting techniques,designing a water heater,testing various building materials, how to generate electricity, and finally blueprinting the house.
Solar Water Heater
We created a solar water heater to heat our house using no electricity. We were supposed to use the least amount of connections between tubes, so that the risk of leakage is reduced. My group used 0 connections. We brought in 2 boxes, one smaller than the other. The bigger one we insulated with newspaper, the smaller one we covered with a black trash bag. We put water in the smaller box and using tin foil, we attracted heat from the sun.
Here is a picture of our solar water heater:
|
|
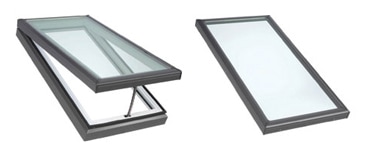
Day-lighting Techniques
We tested day-lighting techniques by building a simple model home and using a flashlight to mimic the sun. This helped us deduce where to correctly place our windows to gather the most light recording how much light each window allowed. Some of the types of windows we used are:
Light Shelves: Reflective horizontal surfaces that bounce light deep into a building. Placed above eye level Clerestory Windows: Windows placed near the ceiling to admit light into a building
Solar Tubes: Tubes in the roof of a building which allow light to enter after being reflected through the tube and diffused after exiting the tube to evenly cover an area.
Skylights: A window placed on the top of a building to capture light
Here is the model that we built to test our day-lighting techniques:
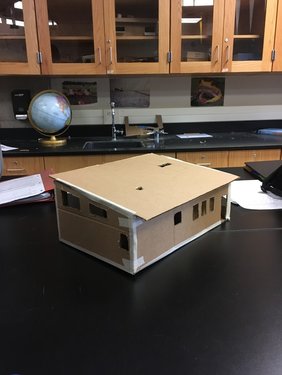
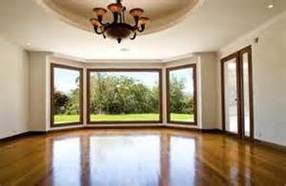
This is the finished model of our day-lighting house.
|
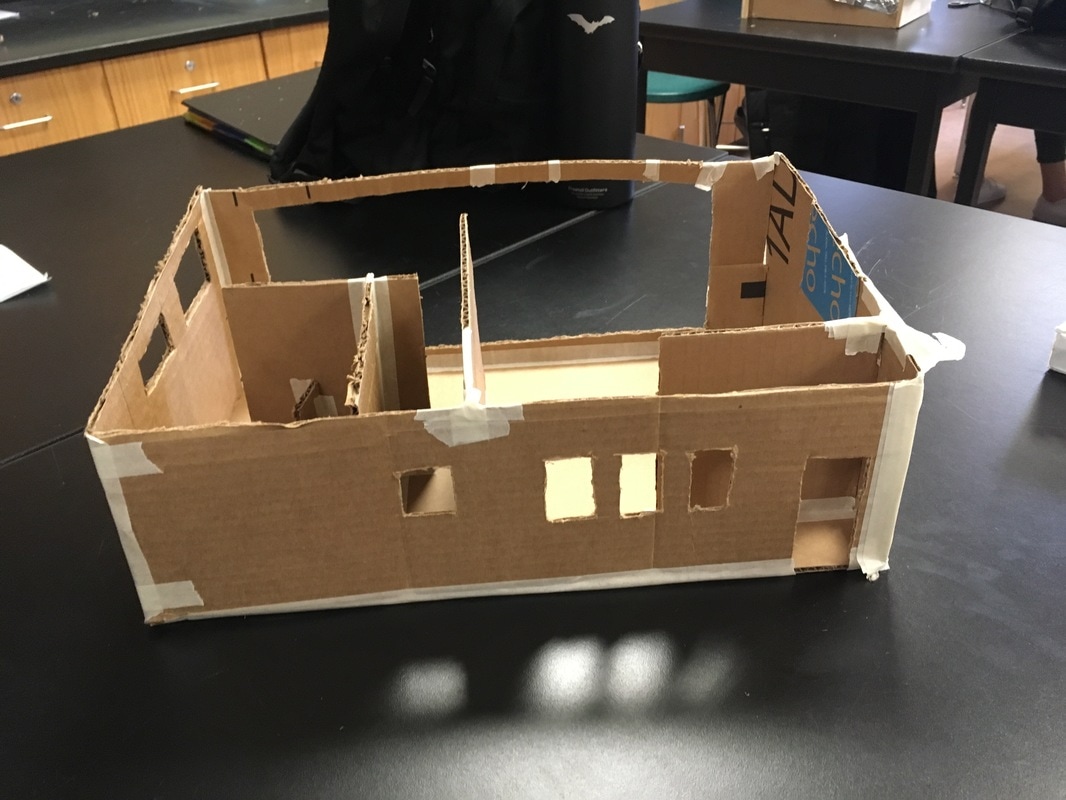
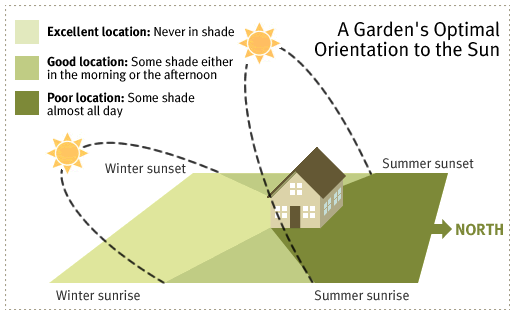
As you can see, we have included south facing clerestory windows so that we can use the sun to our advantage.
|
Materials Heat Test Lab
We then tested materials under heat to see how much heat it can hold. We did this by using a heat lamp and keeping the material under it for ten minutes, recording the data every two minutes. We still recorded the data after we turned off the lamp to see how fast it cooled . By using a laser thermometer we determined which materials had a high specific heat capacity, and which ones had a low specific heat capacity.
Here is my data that I recorded:
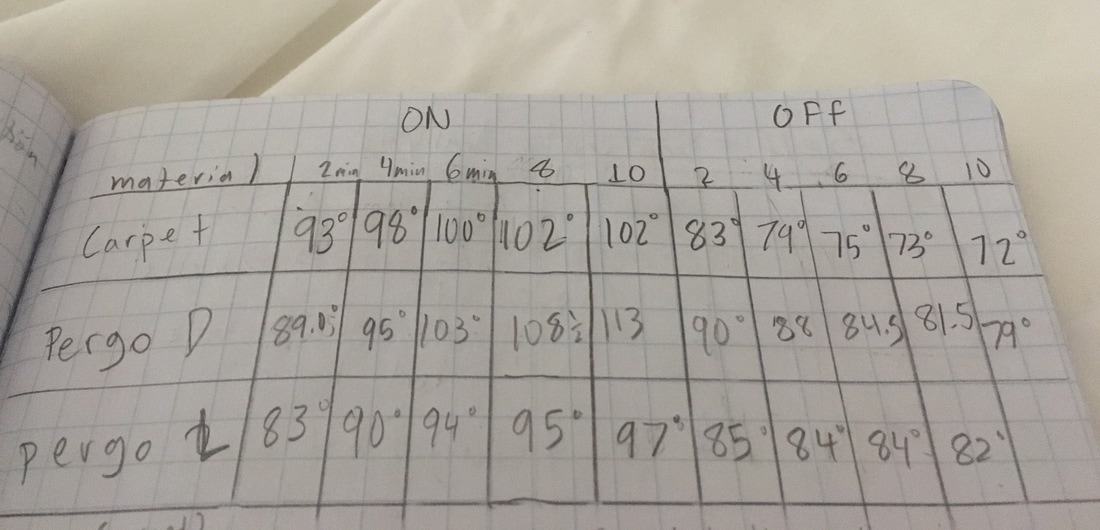
Here is the analysis and conclusion I completed after:
| passive_solar_home_design_project.pptx |
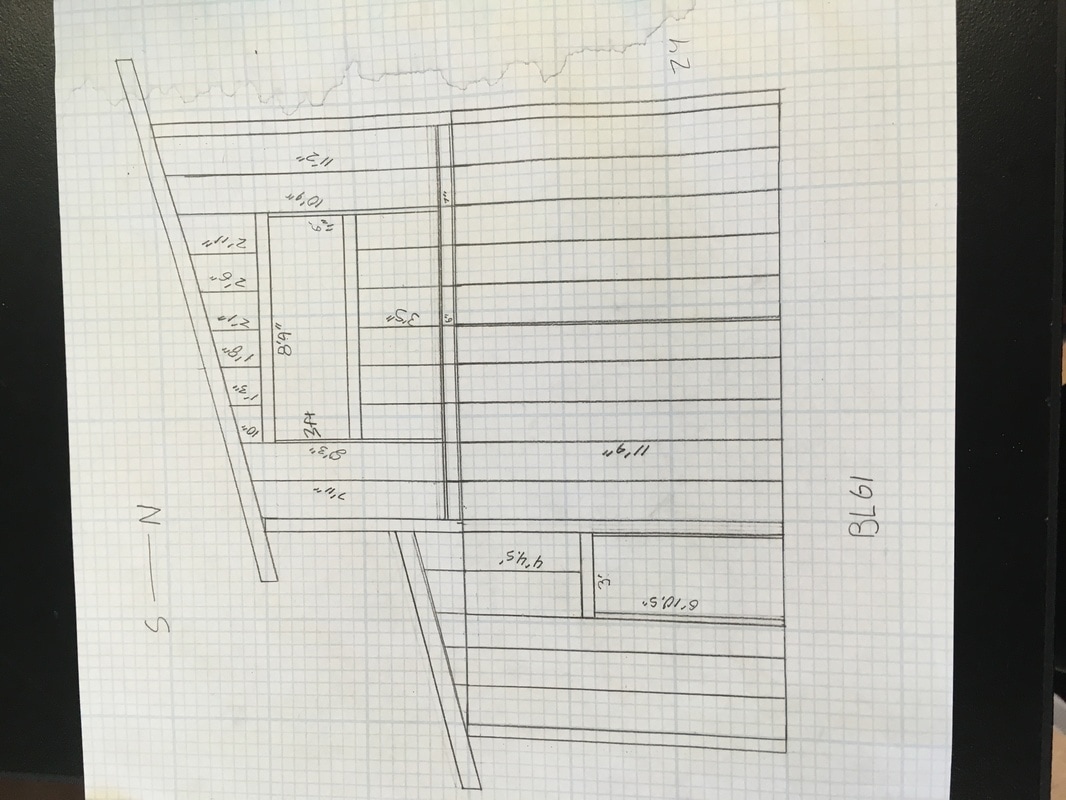
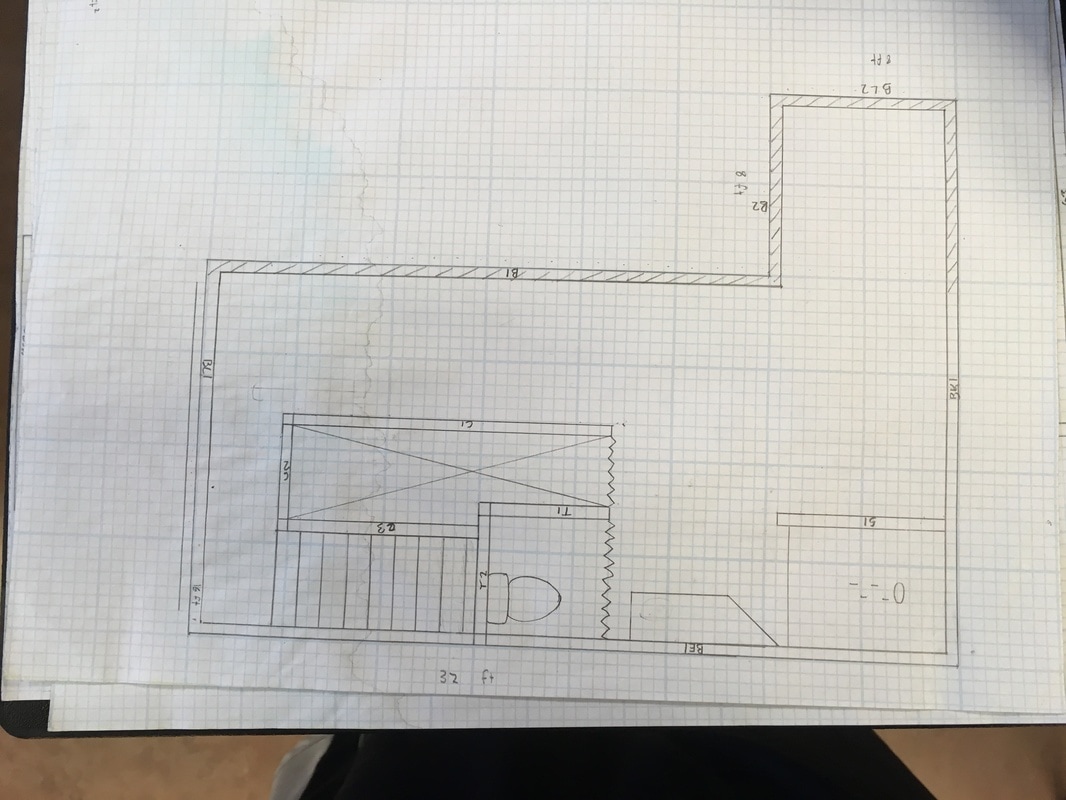
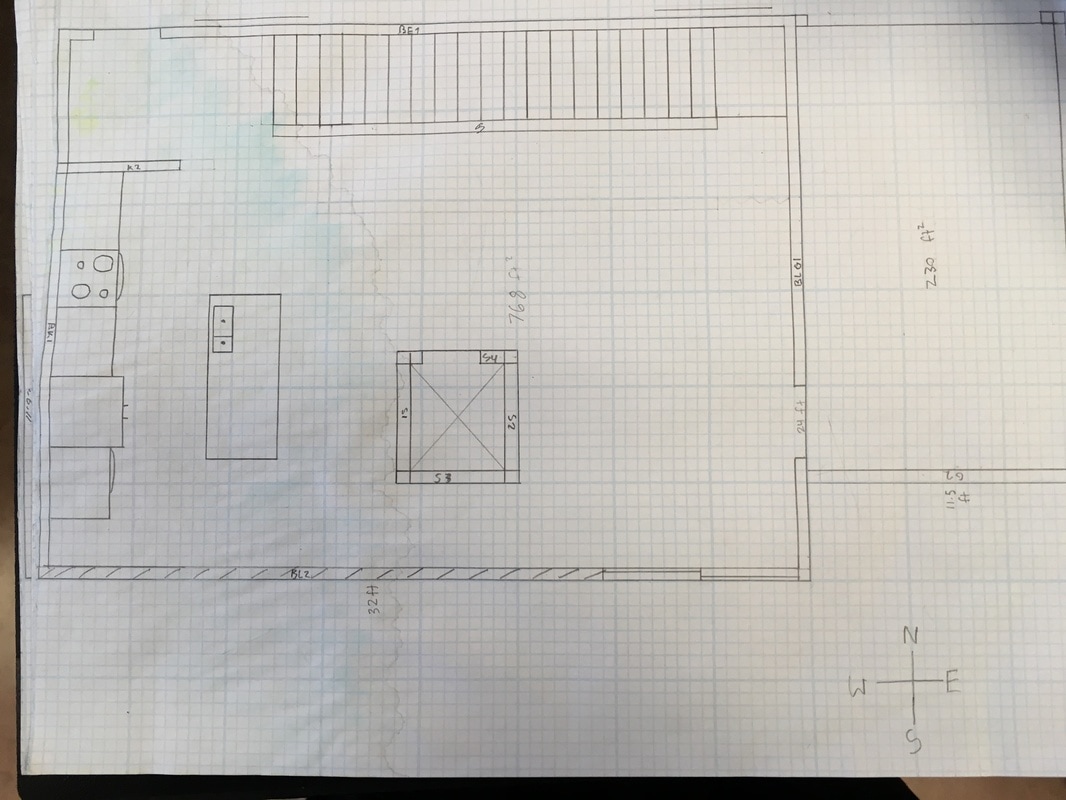
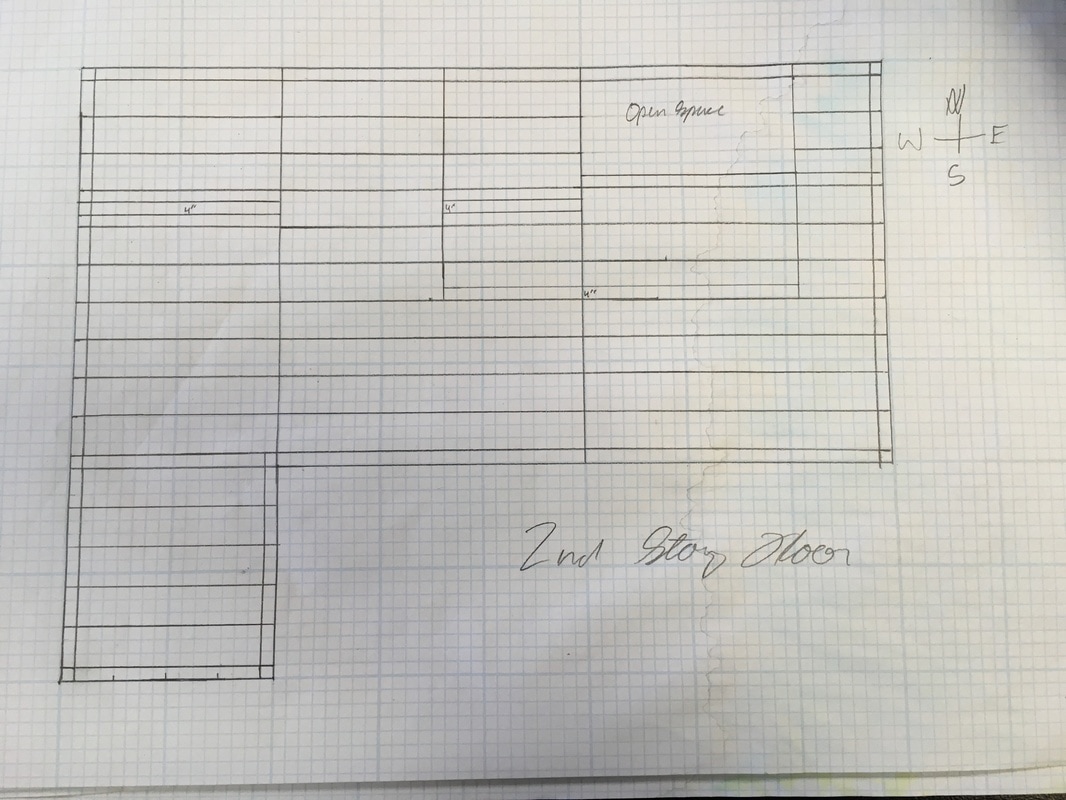
Blueprints
Here are my groups full blueprints.
|

|
|
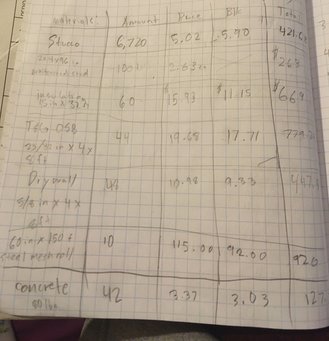
Materials List and Budget
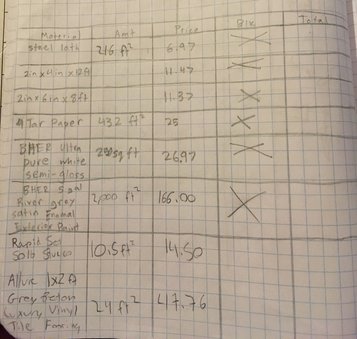
|
|
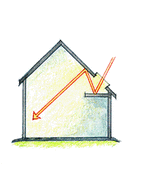
Terms and Concepts Heat Transfer: Radiation: The transfer of heat through any medium Convection: The transfer of heat through liquids Conduction: The transfer of heat through solids Insulation: An object that does not easily allow heat, and other forms of energy to easily pass through it. A skylight is a window installed in a roof or ceiling. |
Clerestory windows
|
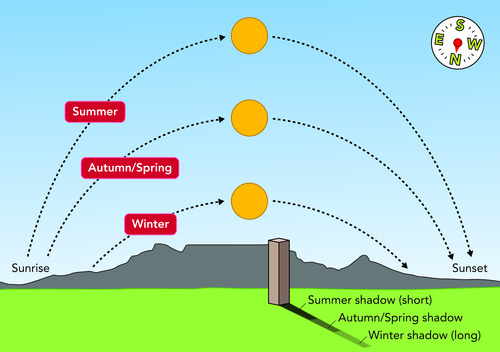
Terms And Concepts Continued
This diagram is a perfect example of where to place windows in your house. The south side is the best because it will capture the most amount of light. This is where you use clerestory windows to capture the most amount of light. clerestory is a high section of window that contains windows above eye level. The purpose is to admit light, fresh air, or both. A light shelf is a horizontal surface that reflects daylight deep into a building. Light shelves are placed above eye-level and have high-reflectance upper surfaces, which reflect daylight onto the ceiling and deeper into the space. |
| energyjustification342017__2_.docx |
Reflection
Overall this project went very well. My group was mostly on the same page, and most of us knew what we had to do. We completed everything on time and didn't have any major complications. We would sometimes finish just before a deadline, because not all of us were engaging in the project. There were many times when we were off task and didn't complete the job at hand because we were taking advantage of the teacher not being present. That is one of the things I need to work the most on; staying focused and on task.
Overall this project went very well. My group was mostly on the same page, and most of us knew what we had to do. We completed everything on time and didn't have any major complications. We would sometimes finish just before a deadline, because not all of us were engaging in the project. There were many times when we were off task and didn't complete the job at hand because we were taking advantage of the teacher not being present. That is one of the things I need to work the most on; staying focused and on task.
